在 Flutter 中适配 1Password 登录
最近在开发 Flutter 项目,其中 iOS 版 App 账号登录时,需要适配 1Password 等密码管理器,即需要告诉 1Password 等密码管理器当前 App 的登录特征信息(域名),以及应该填写界面上的哪些表单项。在这儿记录一下要点。
基本设置
我们首先要处理的,是让 App 和某个域名(通常是官网域名)关联,这样在 App 中唤起 1Password 填写密码时,1Password 才知道应该显示哪些账号。
这儿主要有三个步骤。
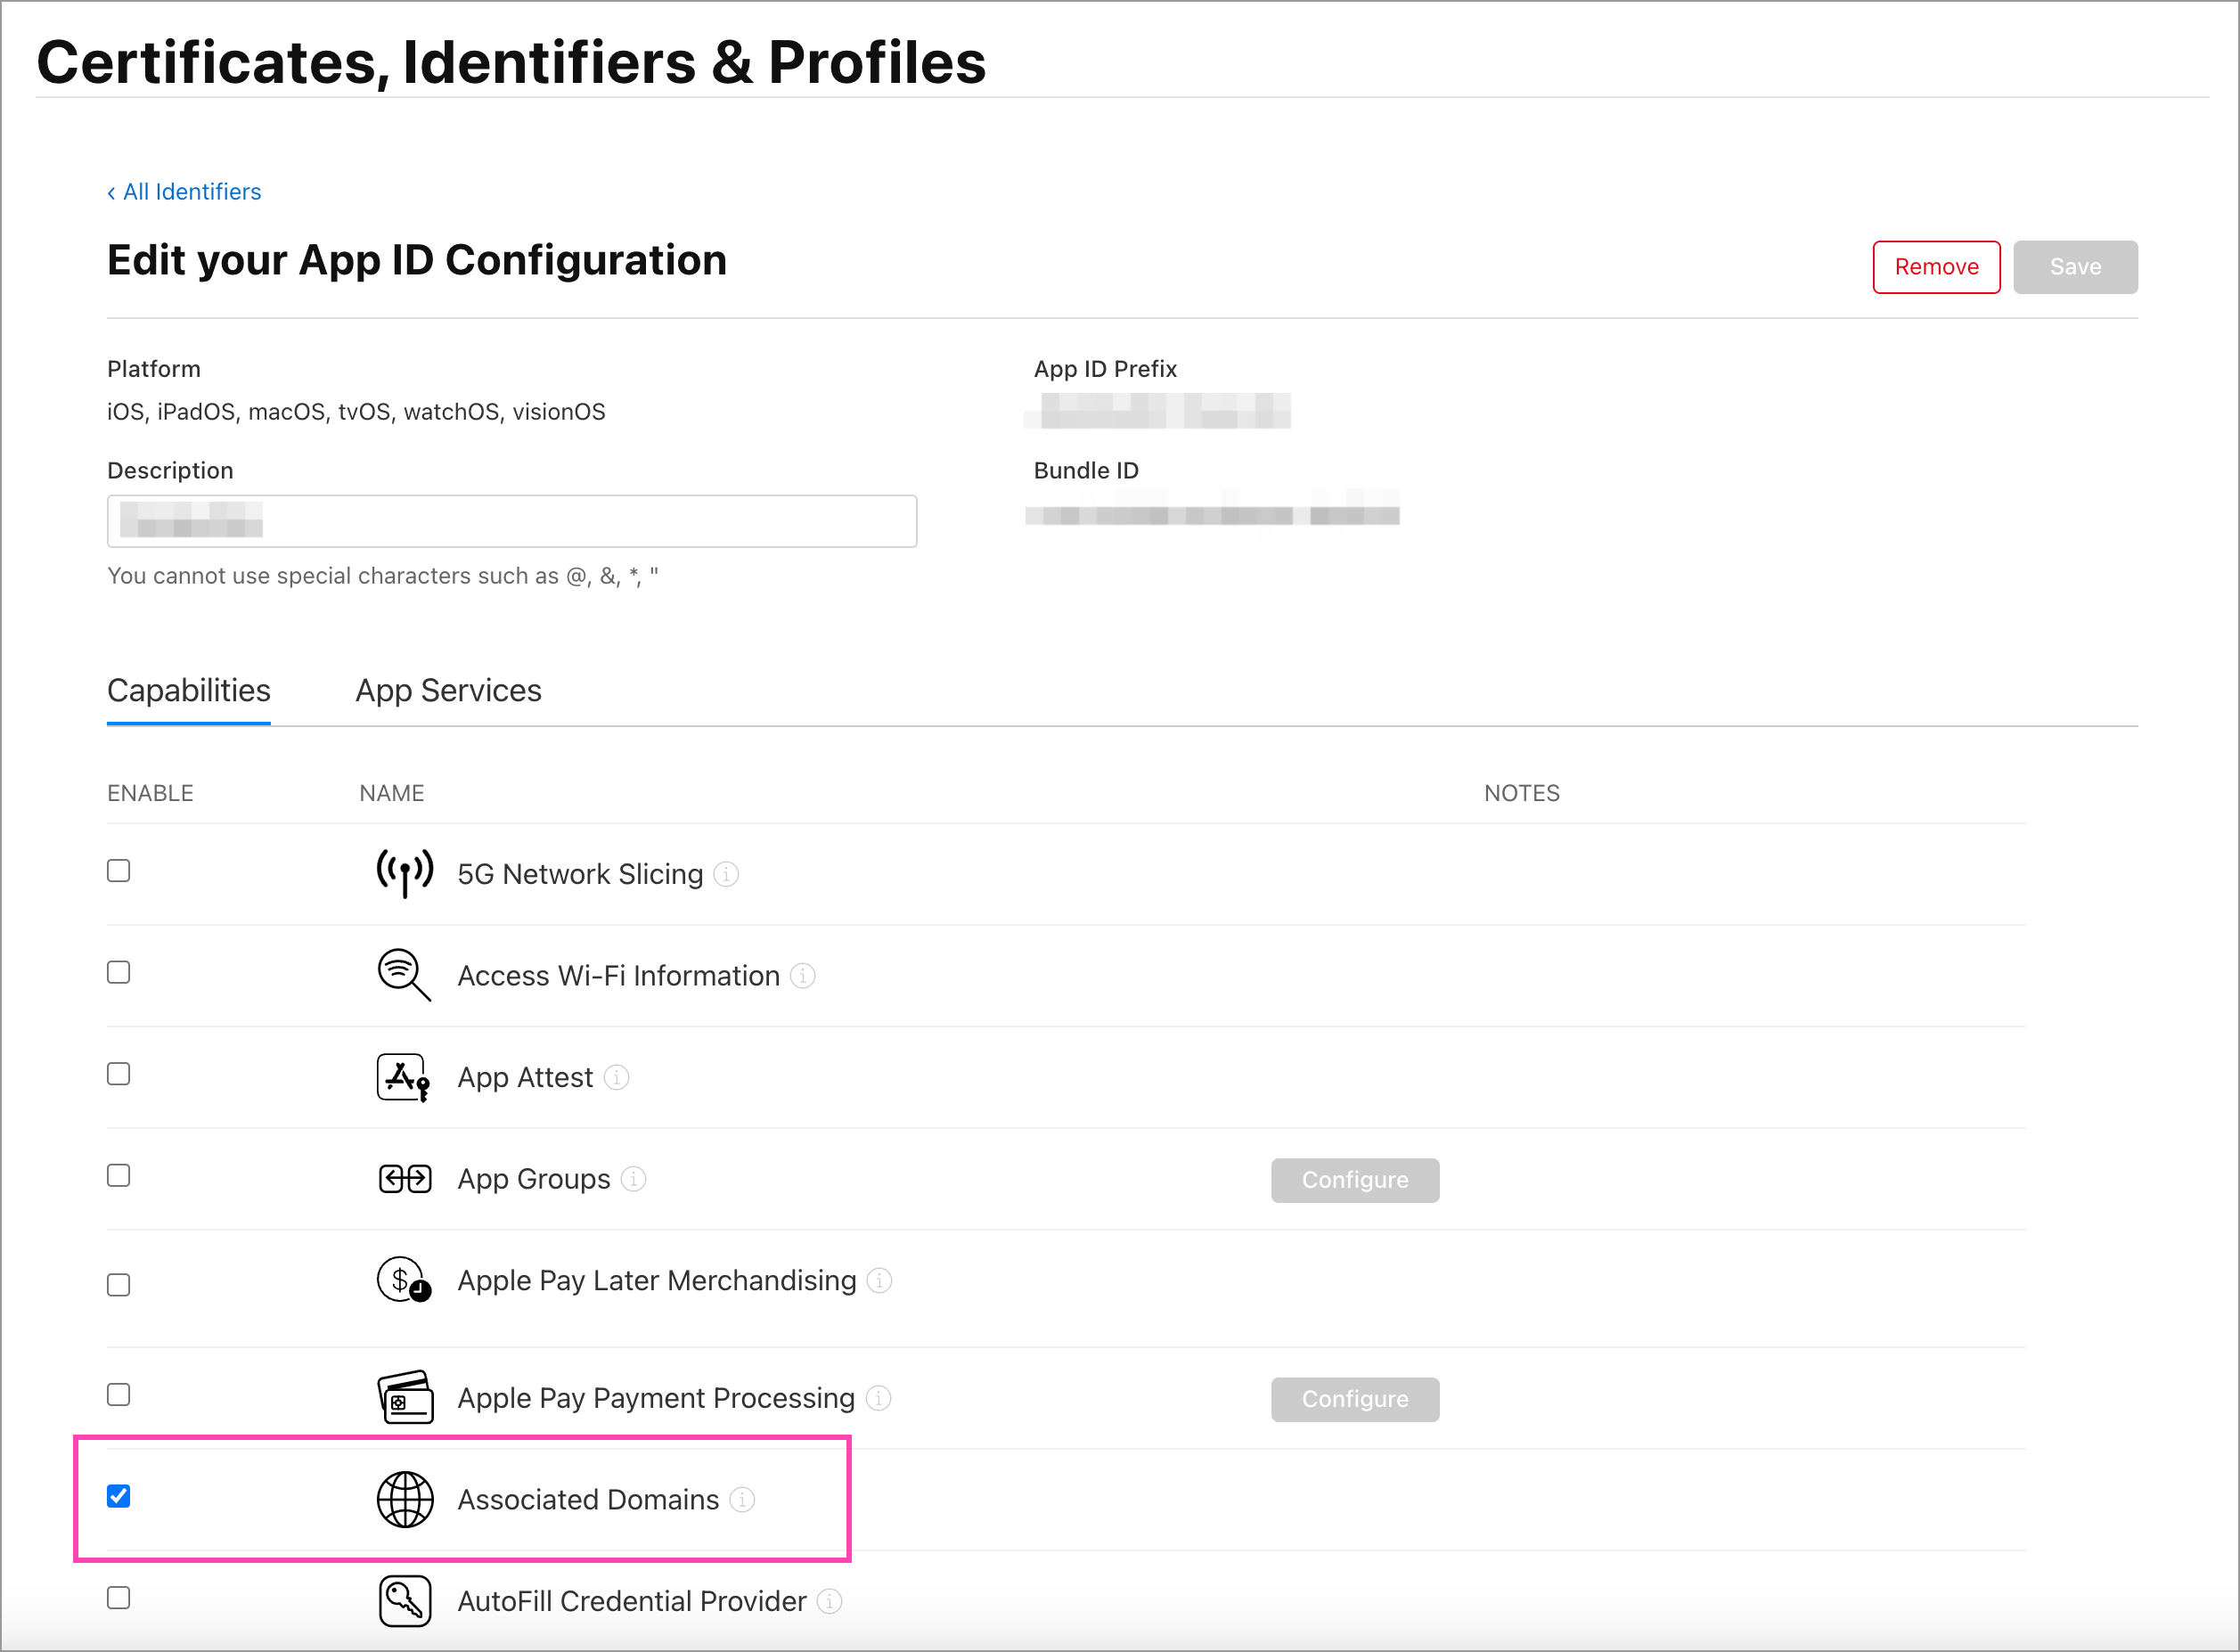
Apple 开发者后台设置
在 Apple 开发者后台的 Certificates, Identifiers & Profiles 页面,记得要选中 Associated Domains 选项,如下图所示:
Xcode 中的设置
接下来,要在 Xcode 中为你的 App 添加关联域名,如下图所示:
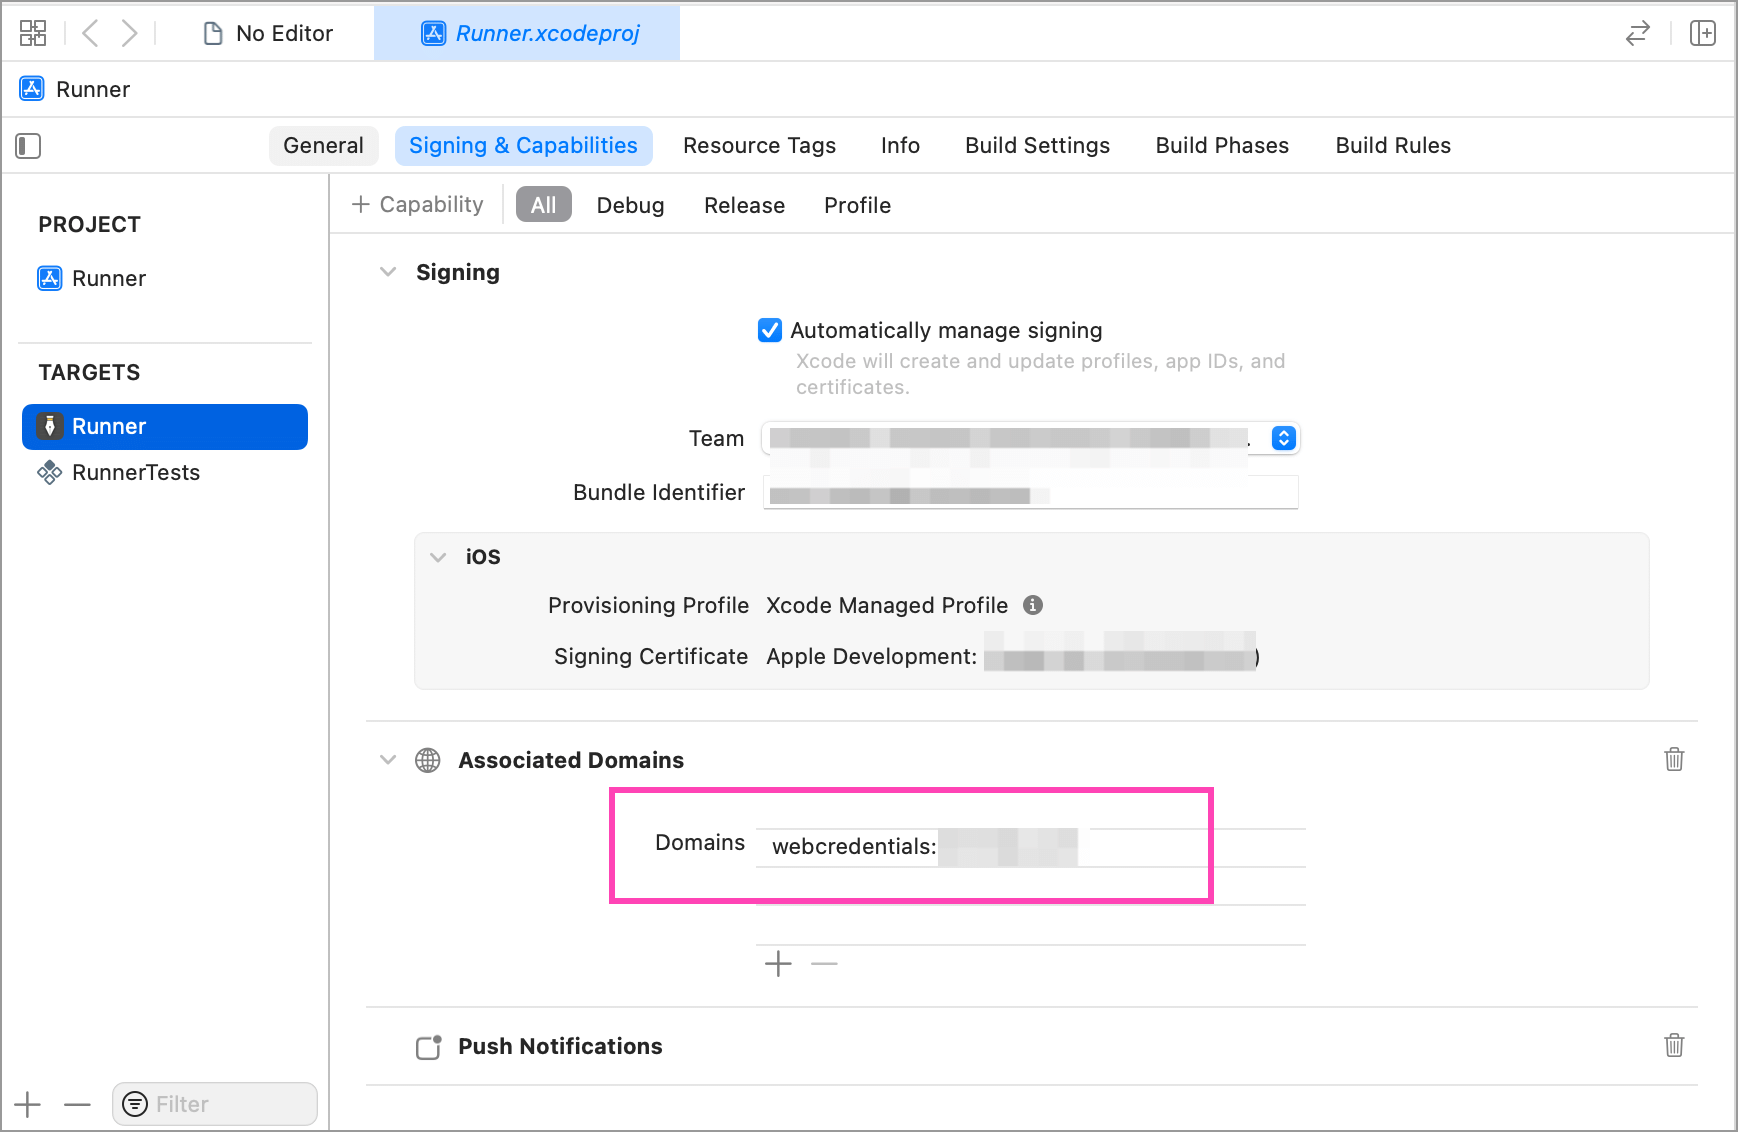
在 Domains 那一栏,添加 webcredentials:你的域名 即可,比如你的域名是 test.com,那么添加 webcredentials:test.com 就行。
网站设置
最后,还需要在你的域名对应的网站上添加一个认证文件,证明指定 App 确实和当前域名相关。这个文件的文件名固定为 apple-app-site-association,可以放在网站的根目录,或者 .well-known 目录下,确保可以通过网络访问到。
这个文件的用途很多,可能还会包含一些其他字段,和密码管理器相关的主要是以下内容:
{
  "webcredentials": {
    "apps": [
      "TeamId.BundleId"
    ]
  }
}
确保你的 apple-app-site-association 文件包含 webcredentials 字段,并将其中 apps 中的 TeamId、BundleId 换成你的真实 ID。
Flutter 中的设置
为了得到更好的登录体验,Flutter 中也要做一些设置,主要是告诉 1Password 等密码管理器需要填写哪些字段,以及各个字段分别对应什么内容。
关键代码如下:
@override
Widget build(BuildContext context) {
  // ...
  return Container(
    body: Center(
      child: AutofillGroup(
        child: Column(
          children: [
            TextField(
              autofillHints: const [AutofillHints.email],
              decoration: InputDecoration(
                labelText: 'Email',
              ),
            ),
            TextField(
              autofillHints: const [AutofillHints.password],
              decoration: InputDecoration(
                labelText: 'Password',
              ),
            ),
            ElevatedButton(
              onPressed: () {
                // Submit the form
              },
              child: Text('Submit'),
            ),
          ],
        ),
      ),
    ),
  );
}
其中最关键的有两处,一是需要自动填写的表单部分,需要用 AutofillGroup 组件包起来,这样 1Password 就知道哪些字段是需要自动填写的。二是 Email、用户名、密码等需要填写的字段,需要添加 autofillHints 属性,比如 autofillHints: const [AutofillHints.email],这样 1Password 才知道当前字段应该填什么内容。
完成这些设置之后,App 登录时就应该能正常适配 1Password 了。
评论: